
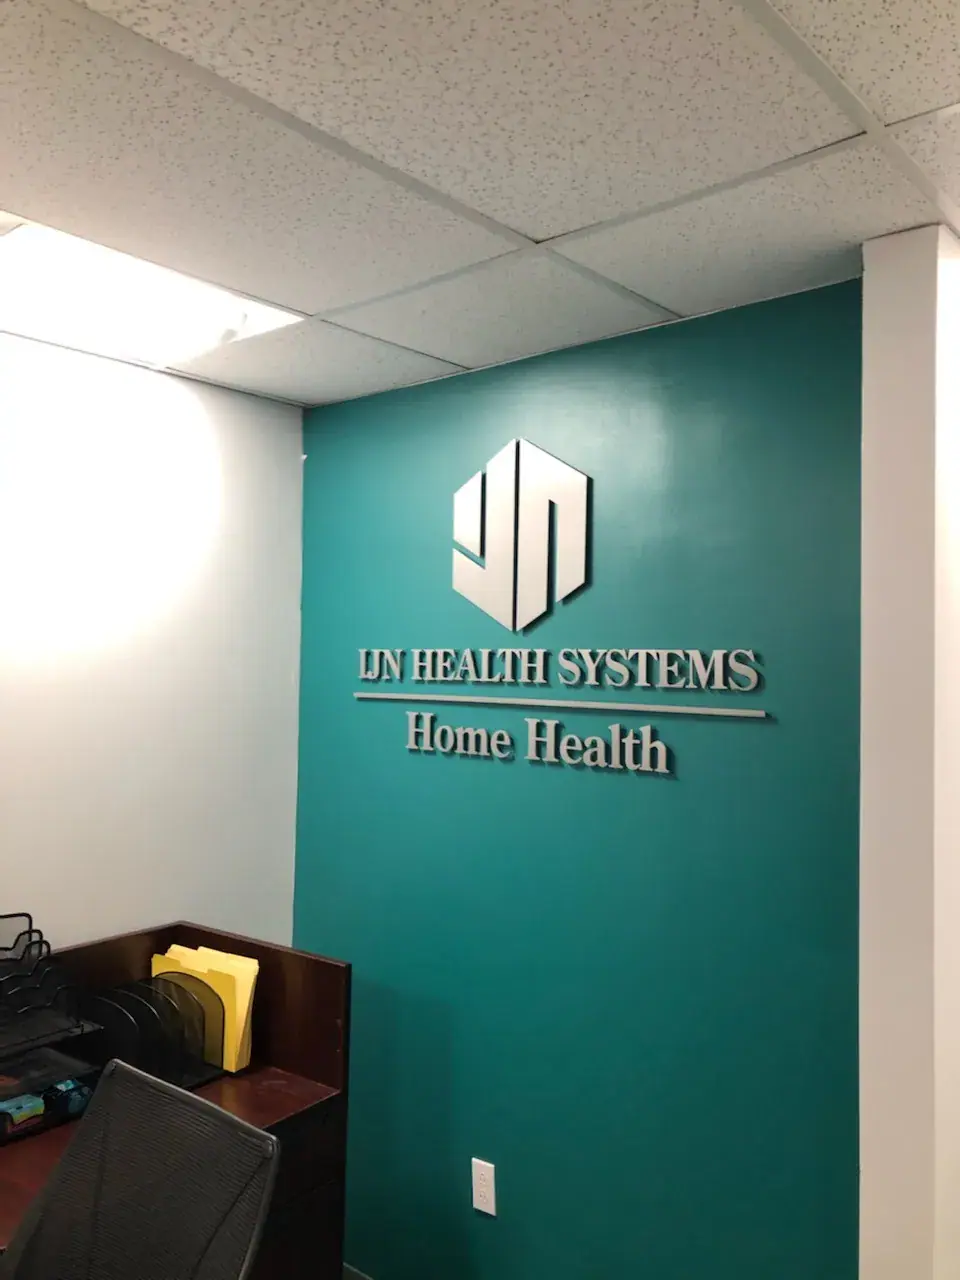
How Much Does a Lobby Sign Cost?
When customers, employees, prospective hires, vendors, or investors enter your business, your reception area begins communicating before anyone says a word.
Your lobby sign is often at the center of that first impression.
But how much should you budget?
A professional lobby sign cost can range from approximately $500 for relatively simple dimensional graphics to $8,000 or more for large, illuminated, custom-fabricated installations. Complete branded reception environments can cost considerably more.
Current industry pricing illustrates the range. Dimensional lobby letters can run roughly $45–$95 per installed letter, while other published estimates place non-illuminated dimensional lobby logos around $800–$5,000 and halo-lit installations around $2,000–$8,000.
The reason for such a large range is straightforward:
You’re not buying a standardized product.
You’re combining your logo, materials, dimensions, wall conditions, finishes, mounting system, lighting, fabrication, and installation into a custom architectural element.
This Signs A La Carte guide explains what drives lobby sign cost, what different types of reception signs typically cost, how they’re installed, and how to choose a solution that fits both your brand and budget.
Average Lobby Sign Cost
Use these numbers for preliminary budgeting rather than as fixed quotes.
Minimum installation price is $350
| Lobby Sign Type | Typical Planning Range |
|---|---|
| Vinyl wall lettering/graphics | $450–$2000+ |
| Basic PVC or foam dimensional letters | $500–$2,500+ |
|
Acrylic dimensional logo unpainted Acrylic dimensional logo painted |
$500–$3,000+ $700– $5,000 |
| Acrylic panel with standoffs | $750–$2,500+ |
| Layered acrylic/PVC sign | $1,000–$3,500+ |
| Metal dimensional letters/logo | $1,500–$5,000+ |
| Mixed-material lobby sign | $2,000–$5,000+ |
| LED halo-lit lobby sign | $2,500–$8,000+ |
| Large custom reception feature | $5,000–$10,000+ |
Published pricing varies substantially by market. For example, current estimates put acrylic dimensional signs anywhere from roughly $500 to several thousand dollars depending on complexity, while metal and illuminated installations generally occupy the higher end of the market.
That’s why the more useful question isn’t:
“How much does a lobby sign cost?”
It’s:
“What type of lobby sign creates the right impression for my space without paying for features I don’t need?”
Types of Lobby Signs and Their Costs
Picking the right lobby sign doesn’t have to feel overwhelming. Let’s walk through your main options together, so you can find the look and budget that fits your space best.
Dimensional PVC and Foam Letters
If you’re watching your budget but still want your logo to pop off the wall, PVC and high-density foam are wonderful places to start. They’re among the most affordable materials for dimensional logos and lettering.
Here’s what you can do with them:
- CNC routed or laser-cut
- Painted
- Layered
- Faced with acrylic
- Faced with metal laminate
- Mounted directly to a wall
- Installed with spacers for added depth
The beauty here is that foam and PVC give you real, eye-catching depth without the weight or price tag of solid metal. Industry material comparisons generally place foam, PVC, and acrylic below solid metals when it comes to initial material cost.
Planning range: $500–$1,500+
These letters are a perfect fit for:
- Small businesses
- Professional offices
- Medical practices
- Startups
- Interior office suites
- Businesses that want dimensional branding on a controlled budget
Here’s a clever little trick: pair an affordable dimensional base with a premium-looking face. For example, a PVC letter + brushed-metal laminate can give you much of the appearance of solid metal—without the solid-metal cost.
Acrylic Lobby Signs
Acrylic is one of those materials that just does it all. It’s endlessly flexible, which is part of why so many businesses fall in love with it.
You can have it:
- Clear
- Frosted
- Colored
- Painted
- Printed
- Layered
- Illuminated
- Mounted with standoffs, or studs and spacers,
Acrylic shines especially bright in modern offices, medical facilities, technology companies, corporate environments, and professional services.
A current 2026 market guide places basic unpainted acrylic dimensional installations sign around $500–$900, while layered or more complex acrylic installations can reach $2,500–$4,500+.
Planning range: $700–$3,500+
Acrylic Panel Signs With Standoffs
Instead of mounting every little piece of your logo one by one, you can apply or mount your graphics onto a single clear, frosted, or colored acrylic panel. That panel then floats a bit off the wall, held in place by metal standoffs. It’s what gives you that familiar, polished “floating” corporate look.
This option is a real lifesaver when:
- Your logo has lots of small pieces
- You’d rather not put numerous holes in the wall
- Your company leases its space
- You want to keep future removal easy
- Your logo needs some visual separation from a patterned wall
Planning range: $750–$2,500+
One nice bonus: a panel can actually make installation simpler. Your installer mounts one assembled sign instead of fussing with dozens of individual elements.
Metal Lobby Signs
When you want that premium, architectural feel the moment someone walks in, metal delivers.
Popular choices include:
- Aluminum
- Brushed aluminum
- Stainless steel
- Brass
- Bronze
Metal lettering tends to be a favorite among:
- Law firms
- Financial institutions
- Corporate headquarters
- Architects
- Engineering companies
- Luxury businesses
- Healthcare organizations
Just keep in mind that solid or fabricated metal typically costs more than foam, PVC, or acrylic.
Planning range: $1,500–$5,000+
Large, thick, custom-finished, or specialty-metal signs can climb quite a bit higher.
Mixed-Material Lobby Signs
Sometimes the most memorable reception signs don’t rely on a single material at all—they blend a few together for something really special.
A few combinations worth picturing:
- Brushed aluminum letters + acrylic logo
- Painted dimensional letters + wood backer
- Metal-faced PVC + clear acrylic panel
Mixing materials creates lovely visual contrast, and it lets designers place the premium touches exactly where they’ll make the biggest impression.
Planning range: $2,000–$5,000+
It’s also a smart way to keep your costs in check. You don’t need solid premium material throughout the whole sign to end up with a premium look—you just need it in the right places.
Illuminated Lobby Signs
There’s something special about a sign that glows. Adding light turns a lobby sign from a simple name on the wall into a true architectural feature—the kind of thing that makes people pause and take notice the moment they walk in.
Here are a few popular ways to bring your sign to life:
Halo-Lit Letters
Picture LEDs tucked behind each dimensional letter, casting a soft glow onto the wall behind them. The result is a gentle halo around every character. It’s subtle, elegant, and honestly a little mesmerizing.
Backlit Logo Panels
Here, the light lives behind an acrylic or fabricated panel, so your whole sign—or the background behind it—lights up. It’s a beautiful way to make your logo feel warm and inviting.
Edge-Lit Acrylic
This one’s a clever bit of design. Light enters through the edge of an acrylic piece and travels across it, making engraved or routed graphics glow from within. It’s a modern, polished look that feels effortless.
Now, a bit of honesty about cost: illuminated signs do run quite a bit more than their non-lit cousins. That’s because you’re adding a few more moving parts, including:
- LEDs
- Power supplies
- Wiring
- Electrical access
- Additional fabrication
- More complicated installation
All those extras add up, so it’s worth planning for. Current market estimates put many halo-lit lobby installations somewhere around $2,000–$8,000, and larger custom systems can climb even higher.
Planning range: $2,500–$8,000+
The good news? That glow tends to pay you back every single day, making a memorable first impression on everyone who steps through your doors.
What Determines Lobby Sign Cost?
Every lobby sign is a little different, and so is its price tag. Let’s walk through the eight things that shape what you’ll pay, so you know exactly where your money is going and how to make smart choices along the way.
Overall Size
It probably won’t surprise you that size plays a big role in cost. A larger sign touches nearly every part of the project:
- Material usage
- CNC or laser cutting time
- Weight
- Finishing
- Mounting hardware
- Installation labor
Here’s the thing to remember, though: bigger isn’t automatically better. What you’re really after is the right visual proportion for your reception area—a sign that feels balanced in the space, not one that’s simply large for the sake of it.
Logo Complexity
Think about two very different logos for a moment.
First, something clean and simple like SMITH & CO.
Now picture a logo with:
- 23 individual letters
- A detailed icon
- Four colors
- Fine lines
- Multiple layers
That second one asks a lot more from your fabricator and installer. Every separate piece may need to be:
- Cut
- Painted
- Finished
- Positioned
- Mounted
So even when the finished sign isn’t especially large, an intricate logo tends to nudge the cost upward. All those little details take time and care to get right.
Material
Material choice is one of the biggest levers you can pull. It can move a project from a few hundred dollars to a few thousand.
As a general rule, here’s how the materials tend to stack up, from more economical to more premium:
Vinyl → Foam/PVC → Acrylic → Metal laminate → Solid aluminum → Stainless steel/brass/specialty metals
That said, this order isn’t set in stone, because fabrication complexity matters too. A highly detailed, multi-layer acrylic sign can actually cost more than a simple aluminum one. So don’t assume metal always means “expensive” and acrylic always means “budget.”
Thickness and Depth
Here’s a lovely little detail people often overlook: dimensional signs create shadows, and those shadows are part of the design. They give your sign life and dimension.
Letters might be:
- ¼-inch thick
- ½-inch thick
- 1-inch thick
- 2 inches thick
- Several inches deep
Greater depth usually means more material and sometimes a different mounting system. But it can also completely transform how premium your finished sign feels. A little extra depth often goes a long way.
Finish
Two aluminum signs can look worlds apart, and the finish is why.
You’ve got options like:
- Brushed
- Polished
- Satin
- Painted
- Powder-coated
- Metallic
- Anodized
- Specialty architectural finishes
If you’d like your sign matched to a specific brand color, keep in mind that custom color matching may add a few extra finishing steps. It’s absolutely worth it for that “this is us” feeling—just something to plan for.
Illumination
Lighting is one of the biggest potential cost increases, so it deserves a little extra attention before you fall in love with a glowing design.
The first question to ask is a practical one: does power already exist behind the wall where your sign will go? If it doesn’t, getting power there can involve:
- Opening drywall
- Running electrical wiring
- Installing power supplies
- Patching
- Painting
- Coordinating an electrician
Here’s an honest heads-up. Your sign itself might cost $3,500—but getting power to it can be a separate project entirely. So do yourself a favor and ask about electrical access before you finalize the design. It’ll save you from surprises later.
The Wall Itself
This is one of the most overlooked cost factors of all, and it can really catch people off guard. A sign going onto standard drywall is a very different job from one going onto:
- Brick
- Concrete
- Stone
- Glass
- Wood slats
- Tile
- Fabric panels
- Decorative wall systems
Your wall’s construction shapes a lot:
- Anchors
- Drilling
- Mounting hardware
- Installation time
- Electrical routing
It can even decide whether your original design is practical in the first place. The best advice here is simple: design the sign for the wall, not independently of it. When the two work together, everything goes smoother.
Installation Height and Access
Where your sign lives makes a real difference too.
A sign hung six feet up behind a reception desk? Usually pretty straightforward. But a 12-foot-wide sign mounted 18 feet high in an atrium? That’s a whole different story.
Tall or tricky installations may call for:
- Scaffolding
- Lifts
- Additional installers
- After-hours work
- Furniture removal
- Building coordination
That’s why it’s smart to talk through access before you get your final quote. A clear picture of the space up front means a smoother install and no unexpected line items at the end.
How Lobby Signs Are Installed
A great installation actually starts long before anyone picks up a drill. The best results come from a little thoughtful planning up front, so let’s walk through how it all comes together, step by step.
Step 1: Site Survey
Before anything else, your sign company should take a good, close look at the space. That means checking things like:
- Wall dimensions
- Wall material
- Viewing angle
- Ceiling height
- Lighting
- Electrical availability
- Furniture
- Reception desk position
- Installation access
Photos can help paint the picture, but for anything complex, there’s really no substitute for someone showing up and seeing the space in person. An on-site survey catches the little details a picture can miss.
Step 2: Determine the Right Sign Size
Here’s a mistake that’s easy to make: sizing your sign based only on how wide your logo is. It’s tempting, but it can lead you astray.
Instead, step back and take in the whole visual field. Picture a small sign floating on a huge wall, even if it’s made from beautiful premium materials, it can end up looking a little lost, almost inexpensive. Go too far the other way, and an oversized sign can crowd and overwhelm a cozy reception area.
What you’re really after is proportion. A sign that feels right at home in its space.
Step 3: Create a Scaled Rendering
Before anyone builds a thing, it’s wonderful to see your sign shown proportionally on the actual wall whenever that’s possible. It’s like a preview of the finished result, and it takes so much of the guesswork out.
Seeing it in place lets you weigh:
- Size
- Position
- Materials
- Colors
- Contrast
- Logo proportions
Here’s a simple test worth trying: Does the sign look nicely sized from the spot where visitors first walk in, not just when you’re standing right in front of it? That first-glance impression is the one that really counts.
Step 4: Fabrication
Now for the fun part, bringing your sign to life. Depending on your design, fabrication might involve any mix of:
- CNC routing
- Laser cutting
- Painting
- Polishing
- Printing
- Laminating
- Metal fabrication
- LED assembly
- Electrical testing
One thing worth keeping in mind: the more manufacturing steps your sign needs, the more it generally costs. Each added process takes time and craftsmanship, and that shows up in the final price, but it also shows up in a sign you’ll be proud to stand behind.
Step 5: Create an Installation Pattern
When your sign is made up of individual dimensional letters, there’s a wonderfully simple tool that keeps everything looking just right: a full-size mounting pattern. Installers plot or print it out at actual scale, and it maps out exactly where every letter and mounting point belongs.
Think of it as a blueprint taped right onto the wall. Without it, keeping everything perfect would be a real challenge, especially your:
- Alignment
- Letter spacing
- Logo proportions
That little bit of prep is what turns a good install into a flawless one.
Step 6: Mount the Sign
Here’s where your sign finally meets the wall. There are a few different ways to get it up there, and each one gives your sign its own look and feel, plus its own effect on installation cost.
- Direct MountYour letters or logo attach straight onto the wall. Clean, simple, and flush against the surface.
- Stud MountThreaded studs extend from the backs of the letters and slip into drilled wall anchors. It’s a sturdy, professional approach.
- Spacer MountThe letters sit slightly away from the wall, which creates those lovely natural shadows that add depth and dimension.
- Standoff MountPanels are held in place with visible architectural hardware, giving you that polished, modern floating look.
- Backer PanelYour whole logo goes onto a single panel first, and then that panel gets mounted to the wall as one neat piece.
Each method changes both how your sign looks and what it costs to install, so it’s worth chatting through the options to find the one that fits your space and your budget best.
Step 7: Electrical Connection
If your sign is illuminated, there’s one more piece to think about: the electrical side of things. Lit signs need a bit of extra coordination to bring that glow to life.
Here’s the friendly heads-up: try to plan for power before the reception wall is finished. Running electrical while a space is still under construction is so much easier than opening up a freshly finished wall later. A little foresight here saves you time, mess, and money down the road, and it means your sign can light up without a hitch.
The $500 Sign vs. the $5,000 Sign
Ever wonder why two lobby signs for the very same company can land at wildly different prices? Here’s a simple way to make sense of it.
Picture one logo. Your logo. And imagine it built four different ways.
Version A — $500–$1,000
Painted PVC letters mounted directly to the drywall. Clean, tidy, and easy on the budget.
Version B — $1,500–$2,500
A layered acrylic logo with brushed-metal faces, floated off the wall on spacers. A noticeable step up in richness and depth.
Version C — $3,000–$5,000
Fabricated metal letters finished with architectural detail. This is where things start to feel truly substantial.
Version D — $5,000–$8,000+
A fully custom dimensional logo with LED halo lighting and all the electrical tucked neatly out of sight. The showstopper of the group.
Here’s the interesting part: the logo itself never changed. What changed was everything around it: the materials, the depth, the fabrication, the installation, and the whole experience of walking in and seeing it.
That’s exactly why asking for a price based on your logo’s dimensions alone rarely gets you a useful answer. The size is only the beginning of the story.
How to Reduce Lobby Sign Cost Without Making It Look Cheap
Good news: saving money doesn’t have to mean settling for something that looks it. With a few smart choices, you can trim the cost and still end up with a sign you’re genuinely proud of. Here’s how.
Use Premium Materials Strategically
You don’t need solid metal from top to bottom to get that premium feel. Instead of fabricating the whole logo from solid metal, consider metal-faced acrylic or PVC. You keep the beautiful finish everyone actually sees while shedding some weight—and often some installation headaches. It’s the look you want, minus the extra cost you don’t.
Let the Wall Become Part of the Design
Sometimes the best backdrop is the one you already have. A gorgeous painted, wood, stone, or textured wall may already be doing most of the heavy lifting visually. In that case, all you really need is clean dimensional lettering to complete the picture. There’s no sense in paying for an elaborate sign backer when your architecture already gives you a stunning one for free.
Avoid Unnecessary Illumination
There’s no denying it. LED lighting can be gorgeous. But before you build it into the sign, take a look around. If your reception area already enjoys great architectural lighting, a few well-placed spotlights might create that same eye-catching glow without the added expense of wiring light into the sign itself. Same effect, gentler price.
Simplify Extremely Fine Logo Details
Those tiny touches, little registered marks, thin taglines, delicate strokes, and intricate shapes—can be surprisingly tricky (and pricey) to fabricate. So it’s worth asking: does every single element really need to be dimensional? Often the answer is no. You might make the main logo beautifully three-dimensional while letting the tagline go on as applied vinyl. It’s a small compromise that most people never notice—but your budget definitely will.
Leasing Your Office? Think About Removal Before Installation
Here’s a cost that catches a lot of businesses by surprise: what happens to your sign when you eventually move out.
If you’re leasing your space, it’s worth pausing on one simple question early on: what happens when we leave?
The answer often comes down to how your sign is mounted. A lobby sign held up by dozens of studs might leave behind dozens of little holes. An acrylic panel floated on four standoffs? Just four. Neither approach is right or wrong across the board, but your lease term absolutely deserves a seat at the table when you’re choosing a mounting method.
Before you commit, have a friendly chat with your landlord about:
- Wall penetration restrictions
- Electrical alterations
- Restoration requirements
- Sign removal requirements
The thing to remember is that your sign’s cost story doesn’t always end on installation day. Down the road, there may be a removal and wall-restoration bill too. Knowing that up front means no unwelcome surprises when it’s time to hand back the keys.
Don’t Evaluate a Lobby Sign Only From Five Feet Away
Almost any sign looks great when you’re standing right in front of it. That’s the easy view. But it’s not the one that matters most.
The view that counts is the one from your entrance door because that’s exactly where your visitor’s very first impression happens. So walk over to the doorway, turn around, and really look. That’s the perspective you’re designing for.
As you take it in, think about:
- Viewing distance
- Contrast
- Letter size
- Wall color
- Reception furniture
- Lighting
- Architectural distractions
A gorgeously made sign can still quietly vanish into the wall if the contrast is off. So give it that honest look from across the room. If it grabs your attention from the door, you know you’ve got it right.
The Smartphone Test
Here’s a modern little consideration that doesn’t get nearly enough love: how does your lobby sign actually look in photos and video?
Think about how often your reception area ends up on camera these days. It shows up in:
- Employee LinkedIn posts
- Recruiting photographs
- Client selfies
- Corporate videos
- Press interviews
- Social media
- Google Business Profile photos
- Website photography
A well-placed dimensional or illuminated sign quietly becomes a branded backdrop that works for you again and again. That means your sign’s value reaches far beyond the people who physically walk through your doors; it travels wherever those photos and videos go.
So try this before you approve anything: pull out your phone and snap a quick photo of the proposed wall. Then ask yourself one honest question: would our logo be clearly visible behind someone standing here?
For a lot of businesses, that single test is exactly the nudge they need when deciding on sign size and placement. It’s a two-second habit that pays off every time your space gets shared with the world.
Comparing Lobby Sign Quotes
Don’t compare only the final price.
Compare the actual specification.
| Question | Quote A | Quote B |
|---|---|---|
| Design included? | ||
| Exact material specified? | ||
| Material thickness specified? | ||
| Finish specified? | ||
| Brand-color matching included? | ||
| Mounting hardware included? | ||
| Installation included? | ||
| Electrical included? | ||
| Wall repair included? | ||
| Warranty included? |
Two signs described simply as “36-inch acrylic lobby logo” can be completely different products.
Current industry guidance similarly cautions that differences in material grade, including services, fabrication and warranty can make superficially similar sign quotes difficult to compare.
What Should You Send When Requesting a Lobby Sign Quote?
Want a quote that’s actually accurate instead of a rough guess? It all comes down to the details you hand over at the start. The more your sign company knows, the closer their pricing will be to reality and the fewer surprises you’ll run into later.
Here’s what’s worth sending along:
- Vector logo file — AI, EPS, SVG, or vector PDF, if you have one
- A photo of the complete wall
- Wall width and height
- Wall construction — drywall, brick, stone, glass, and so on
- Approximate sign dimensions you have in mind
- Brand-color specifications
- Whether you’d like illumination
- Whether electrical power already exists behind the wall
- Photos of the room and the entrance
- The installation address
- Your desired completion date
One small tip that makes a big difference: pop a known measurement or a familiar object into your wall photo, so the fabricator can gauge scale at a glance. It’s a common ask; most sign makers want both your wall dimensions and a few reference photos before they can put together a custom proposal. Give them that, and you’re setting the whole project up for a smooth start.
What Should You Budget?
Every space is different, so think of these as friendly ballpark figures to help you plan, not hard-and-fast quotes:
$500–$1,500
Basic dimensional PVC, foam, or acrylic branding. A clean, budget-friendly starting point.
$1,500–$3,000
More refined acrylic, layered, metal-faced, or dimensional installations. A noticeable step up in polish.
$3,000–$5,000
Premium metal, mixed-material, or larger custom lobby signs. This is where things start to feel truly high-end.
$5,000–$8,000+
Illuminated, architectural, or highly customized reception signage. The full showpiece treatment.
And if you’re outfitting a larger corporate space, think multiple walls, wayfinding, directories, and a complete interior branding system; costs can climb well beyond these ranges. For bigger, more involved programs, current commercial-sign pricing guides often land comfortably in the five figures. That’s simply the nature of branding an entire environment rather than a single wall.
The Best Lobby Sign Isn’t Necessarily the Most Expensive
Here’s something worth holding onto: the goal was never to pile the most material onto the wall. It’s to make the right first impression, the one that feels like you the moment someone walks in.
And that looks different for everyone:
- A law firm might shine with restrained brushed-metal dimensional letters.
- A technology company could lean into illuminated acrylic.
- A construction company might blend wood and metal for something with real character.
- A medical practice may prefer clean dimensional acrylic with a subtle bit of depth.
The best sign is the one where everything lines up:
Your brand + your architecture + the viewing distance + your budget + the installation conditions.
When those pieces work together, the result just feels intentional.
So here’s a little reframe that tends to lead somewhere much better. Instead of only asking:
“How much will my lobby sign cost?”
try asking:
“What can we create within my budget that looks intentional in this specific space?”
That second question opens up all the good options, and it almost always points you toward a sign you’ll be genuinely happy to stand behind.